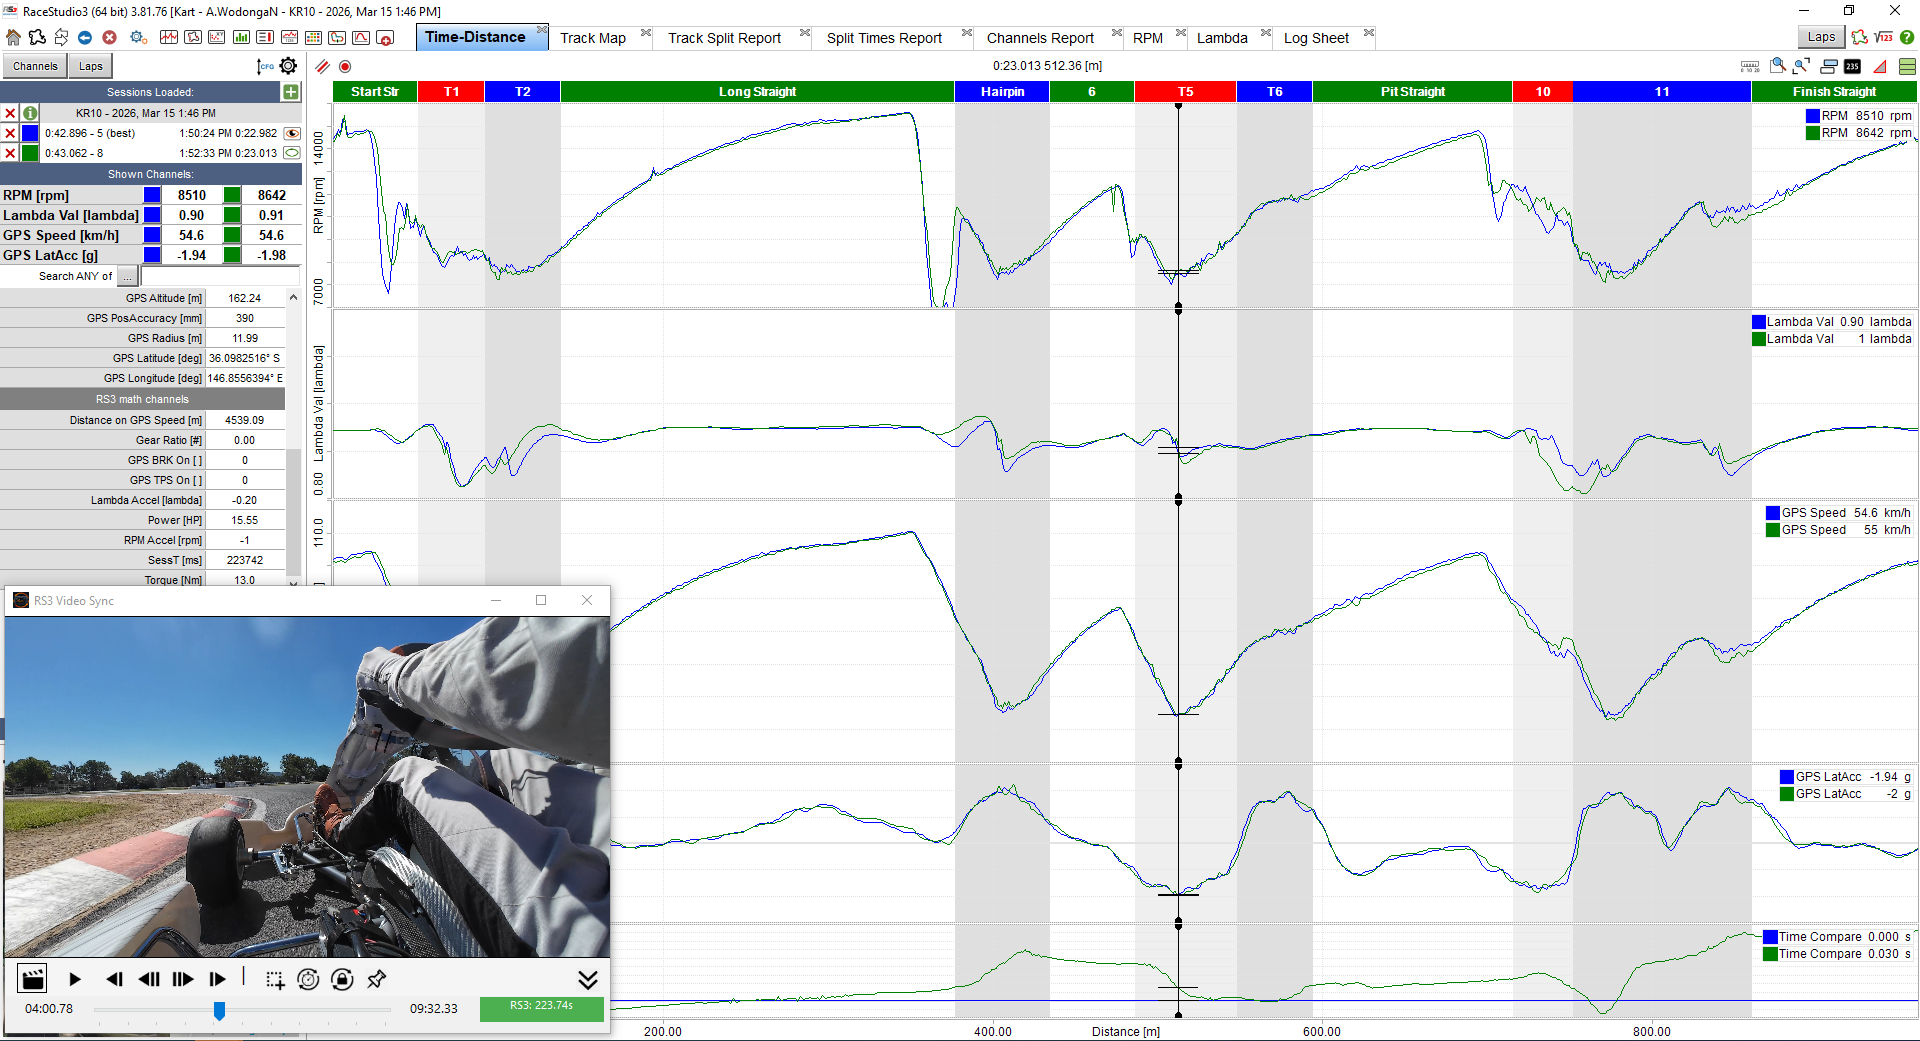
RS3 Sync links AIM data with onboard video so you can review laps in context.
Most setup guidance here is shown with Race Studio 3, which remains the main workflow,
but RS3 Sync now also supports RS2 compatibility for supported scenarios.
Important: RS3 Sync relies on the SessT (Session Time) channel in Race
Studio 3.
That channel is not enabled by default, so setup in RS3 is required before syncing will work.
RS3 Sync is built for racers and coaches who already use AIM data and want a practical way to review
telemetry and onboard video together, without needing an expensive camera ecosystem.
No special camera required
Use the video you already record from GoPro, DJI, Insta360 or similar cameras.
Trial-first workflow
Install the app, try it with your own data and video, then activate later if it suits your setup.
Designed for AIM Race Studio users
RS3 Sync sits beside Race Studio 3 and follows a workflow that feels familiar.
What RS3 Sync does
The app reads the visible session time from your Race Studio 3 screen, then moves the video to the
matching point.
Once the sync offset is set, you can scrub around the lap in RS3 and see the corresponding onboard footage
immediately.
Complete the Race Studio 3 setup first so the session time is available to read.
2
Open your RS3 session
Load the session you want to analyse and make sure SessT is visible on screen.
3
Load your video
Open the matching onboard video file inside RS3 Sync.
4
Set the sync point
Match both to the same moment, then click Set Sync Position.
Basic workflow
Once the sync point is saved, you can scrub the RS3 cursor through the session and the video will follow.
This makes it much easier to connect braking, throttle and line choice to what the data is showing.
This short video explains how RS2 syncing works, including the key limitations around
Master Clk [ms] and why a tight OCR region is required.
RS3 Sync is primarily designed for Race Studio 3, which provides the best and most reliable experience.
Support for Race Studio 2 is included for legacy users, but the workflow is more limited and requires
more manual setup.
Important: RS2 does not provide a stable single time channel like RS3.
RS3 Sync must read the Master Clk [ms] value directly from the screen,
which makes the setup more sensitive and less flexible.
Why RS2 is more limited
In Race Studio 3, the SessT channel displays a single value for the active reference lap.
This allows RS3 Sync to follow cursor movement and lap selection reliably.
In Race Studio 2, the Master Clk [ms] measure can display values for multiple laps at the same time.
When more than one lap is selected, multiple values are shown and RS3 Sync has no way to determine which value
belongs to the reference lap.
Because of this, RS3 Sync cannot automatically switch video correctly between laps in RS2.
Instead, you must select the OCR region around the specific value you want to use.
Recommended setup (RS2)
Move Master Clk [ms] to the top of the measures list
Select a very tight region around the value only
Avoid including labels or nearby values
If you want to sync to a different lap, reselect the region around that lap’s value
Key limitation: If multiple laps are selected, RS2 will display multiple values.
RS3 Sync cannot determine which one is the reference lap, so you must manually choose the value
by selecting the region around it.
Should I use RS2 or RS3?
Use RS3 if possible — smoother workflow and automatic lap handling
Use RS2 if you are already working in it and understand the limitations
Loading a Video
Use the app's video open function to load your onboard footage. MP4 is the most typical workflow.
Choose the video file that matches the RS3 session you want to review.
Trim long videos beforehand if you want faster loading and easier handling.
For the best experience, use a video with a stable frame rate and a clear view of the lap.
Recommended workflow
First load the RS3 session, then load the matching video, then scrub both to the same reference point
before setting sync.
Selecting the Time Region
RS3 Sync reads the visible time value directly from your AIM Race Studio screen.
The selected region must contain only the time value you want RS3 Sync to read.
RS3 workflow
In Race Studio 3, RS3 Sync reads the SessT channel.
This displays a single value for the active lap, allowing reliable syncing across laps.
RS2 workflow
In Race Studio 2, RS3 Sync reads the Master Clk [ms] measure.
When multiple laps are selected, RS2 may display multiple values at once.
RS3 Sync cannot determine which value belongs to which lap.
RS2 limitation: You must select a very tight region around the specific
Master Clk [ms] value you want to use.
If you want to follow a different lap, reselect the region around that value.
Good selection
Tight around the SessT value
High contrast text
No extra labels or nearby controls
Avoid
Large regions with extra UI
Low contrast backgrounds
Selections that include other changing numbers
Why this matters
The cleaner the region, the more stable the OCR result. Better OCR usually means smoother and more
reliable syncing.
Setting the Sync Point
The sync point is the moment where the visible RS3 session time and the video position represent the same
event.
Move the RS3 cursor to a known reference point.
Scrub the video to that exact same moment.
Click Set Sync Position.
Good reference points
Crossing the start/finish line
A distinctive curb strike
A visible steering or braking event that is easy to identify
Tip: Use a point that is visually obvious in the video and easy to locate in the
telemetry timeline.
Playback & Analysis
After sync is set, RS3 Sync follows the session time shown in Race Studio 3. Move the RS3 cursor and the
video should move with it.
What this lets you analyse
Brake release timing
Throttle pickup and hesitation
Line choice and curb usage
Hands and steering rate compared to speed and G force
Typical workflow
Pause frequently, move the data cursor in RS3, then compare what the footage shows at the same point.
This is often much more useful than watching video and data separately.
You can also use the Race Studio cursor to find a spot on the video and start playback in RS3 Sync from
that point.
Tip: Use , and . to slow down or speed up playback for
detailed analysis.
Controls & Shortcuts
RS3 Sync includes keyboard shortcuts for playback, lap review, sync control and quick analysis.
These shortcuts only work when the RS3 Sync window has focus.
Playback & Navigation
Key / Control
Action
Space
Play / Pause
Left
Step back 1 frame
Right
Step forward 1 frame
Down
Jump back 1 second
Up
Jump forward 1 second
PageDown
Jump back 10 seconds
PageUp
Jump forward 10 seconds
O
Open video
Playback Speed
Key
Action
, / <
Reduce playback speed
. / >
Increase playback speed
/
Reset playback speed to 1.00x
Volume
Key
Action
-
Reduce volume
+ / =
Increase volume
0
Mute / Unmute
Sync & Window Controls
Key
Action
S
Toggle sync on / off
T
Toggle always on top
H
Hide / Show controls
M
Maximise / Minimise Window
F1
Open help
Tip: Playback speed and volume changes show a temporary on-screen message so you can
adjust
them quickly while reviewing a lap.
Trial Limitations
The trial version is limited to the first few minutes of session data. Outside the allowed range, syncing
stops and the app may show a trial limit indication.
This is expected trial behaviour.
The full version removes this restriction.
It is still worth using the trial to confirm the app works well with your own workflow.
Troubleshooting
Video not syncing
Confirm SessT is enabled in Race Studio 3.
Confirm SessT is visible in the channels window or on screen.
Re-set the sync point and make sure both are aligned to the same moment.
If RS3 Sync cannot read SessT correctly, the app will show as not synced (the green indicator will not
be active).
OCR unstable or incorrect
Choose a tighter OCR region.
Reduce extra UI elements inside the selected area.
Use a higher contrast display layout if possible.
RS2 shows multiple values
RS2 may display more than one Master Clk [ms] value when multiple laps are selected
RS3 Sync cannot determine which value belongs to the reference lap
Select the OCR region very tightly around the value you want
If switching laps, reselect the OCR region for that lap
Playback feels jerky
Make sure Race Studio 3 is actually running and visible.
Avoid minimising RS3 while trying to sync.
Check that the selected OCR region still matches the visible SessT field.
Shortcuts not working
Click inside the RS3 Sync window first.
Check whether the hidden controls state affects focus in your current build.
Analysis Tips
Use one clear sync reference
Choose a consistent marker like start/finish or a specific corner event.
Keep SessT easy to read
A clear, stable time display makes the OCR more reliable and the app easier to use.
Compare driver actions to traces
Look at steering, line and throttle timing against speed and G force changes.
Pause often
Short stop-start review is usually more useful than trying to watch a whole lap continuously.
Help Videos
Short walkthrough videos are available on the
RS3 Sync YouTube channel
covering setup, syncing and common workflows.